Cavity wall insulation works by filling the gap between the two leaves of your external walls with a material that slows heat transfer. That’s the textbook answer, and it’s what most guides tell you.
What they don’t explain is how an installer actually gets the material into the cavity, how we verify it’s properly filled, and why the wrong material in the wrong property causes the damp and cold-spot problems you’ve probably read about online.
We’re Insul8 — Trustmark-registered cavity wall insulation installers based in Nantwich, Cheshire. We install cavity wall insulation across the North West and Midlands every week, and we also extract and replace insulation that’s failed. That gives us a perspective most guides can’t offer: we see what good installations look like years later, and we see what bad ones look like when we pull them out.
This guide explains how cavity wall insulation actually works — the science, the installation process, and what separates a job that lasts 25 years from one that causes problems.
What is a cavity wall?
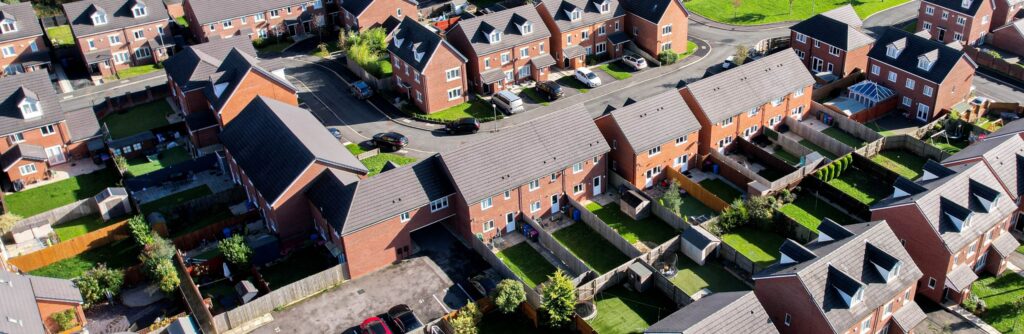
Most UK homes built from the 1920s onwards have cavity walls. A cavity wall is made up of two separate layers of masonry — an outer leaf (usually brick) and an inner leaf (brick or concrete block) — with a gap between them, typically 50mm to 75mm wide. Metal wall ties bridge the gap to hold the two leaves together structurally.
The cavity was originally designed as a moisture barrier. Rain soaks into the outer leaf, but the air gap stops it reaching the inner leaf and the inside of your home. It works well for keeping water out — but it also lets heat escape. Warm air from inside your home heats the inner leaf, that warmth crosses the cavity by convection and radiation, heats the outer leaf, and escapes to the outside.
In an uninsulated home, up to 35% of your total heat loss happens through the walls. That’s more than the roof, floors, or windows.
Not sure whether your home has cavity walls or solid walls? There’s a straightforward way to check — read our guide on how to tell if your home has cavity walls.
How does cavity wall insulation reduce heat loss?
An empty cavity lets heat move freely from the warm inner leaf to the cold outer leaf. This happens through convection — warm air rises on the inner side, cools as it meets the outer leaf, sinks, and circulates continuously. It also happens through radiation across the gap.
Filling the cavity with insulation material disrupts both of these processes. The insulation traps air in millions of tiny pockets within its structure, which prevents convection currents from forming. Heat can still conduct through the material, but it does so far more slowly than it moves through open air.
The result is a thermal barrier between the inside and outside of your home. Your heating system works less hard to maintain a comfortable temperature, your walls feel warmer to the touch, and cold spots on external walls — a common cause of condensation and mould — are significantly reduced.
According to the Energy Saving Trust, a typical semi-detached home can save around £240 per year on heating bills after cavity wall insulation is installed. For detached properties, that figure can reach £410 or more.
How we install cavity wall insulation
The installation process itself is straightforward for a trained installer, but there’s more to it than drilling holes and pumping material in. Every step exists for a reason, and skipping or rushing any of them is usually where problems start.
Here’s what happens when we install cavity wall insulation.
Pre-installation survey
Before any drilling begins, we carry out a full assessment of your property. This is not a formality — it determines whether your home is suitable for cavity wall insulation and, if so, which material is the right choice.
During the survey, we check:
- Cavity condition — using a borescope (a small camera inserted through a drilled test hole), we inspect the inside of the cavity. We’re looking for rubble, mortar snots on wall ties, debris from the original build, existing insulation, or signs of moisture. A cavity full of builder’s rubble cannot be insulated without clearance first.
- Cavity width — we measure the gap between the inner and outer leaves. The minimum for most insulation materials is 50mm. Narrower cavities, common in some 1930s and 1940s properties, may not be suitable or may require a different approach.
- Brickwork and pointing — damaged mortar joints, cracked bricks, or deteriorated pointing can allow wind-driven rain to penetrate the outer leaf. If insulation is installed behind compromised brickwork, moisture bridges across the fill and causes damp on internal walls. Any defects need repairing before insulation goes in.
- Damp and moisture — we check for signs of penetrating damp, rising damp, or condensation. Insulating over an existing damp problem makes things worse, not better.
- Ventilation — airbricks, underfloor vents, trickle vents, and flue terminals must remain clear and unobstructed after installation. We identify their positions before drilling begins.
If the survey reveals that your property isn’t suitable — whether that’s due to narrow cavities, exposure to severe weather, structural defects, or existing damp — we’ll tell you. We don’t install insulation in homes where it’s likely to cause problems.
The drill pattern
Once the property is confirmed as suitable, we drill small injection holes into the external walls. Each hole is approximately 22mm in diameter — roughly the size of a 20p coin — and is drilled into the mortar joints, not the bricks themselves. Drilling into mortar means the holes can be sealed with colour-matched mortar afterwards, leaving minimal visible trace. It also avoids damaging the bricks.
The holes are arranged in a diamond pattern, spaced at roughly one-metre intervals across the wall face. This geometry isn’t arbitrary — it ensures that when the insulation material is injected, the fill zones from adjacent holes overlap. That overlap is what prevents voids and gaps inside the cavity. A straight grid pattern at the same spacing would leave diamond-shaped gaps between fill zones where no material reaches.
The drill pattern is adapted for each property. Around windows, doors, and where extensions meet the original building, additional holes may be needed to ensure complete coverage of the cavity. Corners and reveals are common areas where voids form if the drill pattern isn’t adjusted.
Injection and fill
We inject BBA-certified insulation material into the cavity through the drilled holes using specialist equipment at controlled pressure. The material flows through the cavity, filling it from the bottom upwards. Filling from the bottom allows air to escape through the holes above as the material rises, which prevents air pockets from forming.
During injection, we monitor the fill at each hole. As the material reaches the level of a hole, we seal it and move to the next one above. This sequential approach lets us track the fill level in real time rather than relying on guesswork. We also monitor the total volume of material used against the calculated cavity volume for the property — a significant shortfall would indicate a blockage or void that needs investigating.
This is one of the steps where poor workmanship shows up. Installers who rush the process — injecting too fast, at too high a pressure, or without monitoring the fill at each hole — are the ones who leave partial fills, voids behind window reveals, and gaps at the top of the cavity where the material didn’t reach.
Sealing
Once the cavity is fully filled, every drill hole is sealed with mortar. We colour-match the mortar as closely as possible to your existing pointing so the holes are barely visible once cured. This isn’t just cosmetic — the seals also need to be weathertight to prevent rain getting in through the injection points.
Post-installation checks
After installation, we carry out a series of checks before we leave:
- Combustion appliance testing — if your home has a gas boiler, gas fire, or any other combustion appliance, we re-test it after installation. Insulating the walls can change the air pressure dynamics inside the property, which can affect how flues draw. This is a safety-critical step that should never be skipped.
- Ventilation confirmation — we confirm that all airbricks, underfloor vents, and flue terminals are clear and unobstructed by insulation material.
- Guarantee paperwork — every installation comes with a 25-year insurance-backed guarantee, independently backed. We hand over the documentation on the day or within a few days of completion.
The full installation typically takes between two and four hours, depending on the size of your property. All work is carried out on the outside of your home, so there’s minimal disruption inside.
For a full overview of our service, including pricing and how to book a survey, visit our cavity wall insulation service page.
What materials are used for cavity wall insulation?
There are three main types of insulation material used for cavity wall fills in the UK. Each has different properties, and the right choice depends on your property type, cavity width, and local exposure conditions.
EPS bonded beads (expanded polystyrene) — small polystyrene beads injected with a bonding agent that holds them together inside the cavity. EPS beads have good thermal performance, low moisture absorption, and don’t slump or settle over time. They’re the most common choice for modern retrofit installations.
Blown mineral wool — loose mineral wool fibres blown into the cavity. Mineral wool is breathable and provides good thermal and acoustic insulation. It’s generally cheaper than EPS beads, but it can absorb moisture in exposed locations, which reduces its effectiveness and can contribute to damp problems if the external brickwork isn’t in good condition.
Polyurethane foam — a foam that’s injected as a liquid and expands to fill the cavity. Foam has the best thermal performance per millimetre of the three options, but it’s more expensive, harder to remove if problems develop, and there are concerns about it restricting cavity ventilation. It’s less commonly used for standard cavity fills than beads or mineral wool.
The material that’s right for your home depends on factors specific to your property. A proper pre-installation survey should always include a recommendation on material choice — not just a default option.
What does a good installation look like vs. a bad one?
Because we offer a cavity wall insulation removal and replacement service, we regularly extract insulation that was installed by other companies and has since failed. That gives us a clear picture of what goes wrong — and what a properly installed cavity looks like by comparison.
A good installation shows consistent, even coverage throughout the cavity. When we inspect a well-insulated wall with a borescope, the material is uniformly distributed with no visible gaps, voids, or areas where the fill hasn’t reached. The material is dry, intact, and sitting cleanly between the two leaves without bridging around wall ties in a way that could channel moisture.
A failed installation typically shows one or more of these problems:
- Partial fill with voids — gaps in the insulation, often at the top of the cavity or behind window and door reveals. This is usually caused by a rushed installation or an inadequate drill pattern that didn’t provide enough injection points for complete coverage.
- Saturated material — insulation that has absorbed moisture, typically because it was installed behind damaged brickwork or in a property exposed to severe wind-driven rain without adequate weatherproofing. Wet insulation loses its thermal properties and actively bridges moisture to the inner leaf, causing damp patches indoors.
- Settlement and slumping — older mineral wool installations from the 1980s and 1990s sometimes show significant settlement, where the material has dropped under its own weight and left the upper portion of the cavity uninsulated. This creates a cold band across the top of the wall.
- Debris contamination — insulation injected into a cavity that wasn’t cleared of rubble and mortar droppings first. The debris creates obstructions that prevent even distribution, leading to cold spots and uneven performance.
The difference between a good and bad installation almost always comes down to two things: whether the property was properly assessed before work started, and whether the installer took the time to do the job correctly. There are no shortcuts that don’t eventually show up as problems.
How long does cavity wall insulation last?
When properly installed in a suitable property, modern cavity wall insulation should last at least 25 years — which is why 25-year insurance-backed guarantees are the industry standard. Many installations will last the lifetime of the building without needing replacement.
That said, insulation can fail sooner than expected if:
- The property wasn’t suitable in the first place (narrow cavity, high exposure, pre-existing damp)
- The installation was rushed or incomplete
- External brickwork has deteriorated since installation, allowing moisture in
- The wrong material was used for the property’s conditions
Signs that your existing insulation may not be performing include cold patches on internal walls that weren’t there before, condensation forming on external walls, mould appearing in corners or behind furniture on external walls, or a noticeable increase in heating bills without a change in usage.
If you suspect your insulation has failed, it can be inspected with a borescope and, if necessary, extracted and replaced. Read more about our cavity wall insulation removal service.
Is cavity wall insulation right for your home?
Cavity wall insulation is one of the most cost-effective energy efficiency improvements you can make — but it’s not suitable for every property. Your home is likely to be a good candidate if:
- It was built from the 1920s onwards and has cavity walls
- The cavity is at least 50mm wide
- The brickwork and mortar joints are in good condition
- There are no unresolved damp or moisture issues
- The property isn’t in a severely exposed location with persistent wind-driven rain
If you’re unsure whether your property is suitable, that’s exactly what our free assessment is for. We survey every property in person before quoting — checking the cavity, brickwork, ventilation, and damp status — so you’ll get an honest recommendation based on what we actually find, not a sales pitch.
Book a free cavity wall assessment or call 01270 814145.
Frequently asked questions
How long does cavity wall insulation take to install?
Most installations are completed in two to four hours, depending on the size and layout of the property. All work is done from the outside, so there’s very little disruption inside your home.
Can cavity wall insulation cause damp?
When installed correctly in a suitable property, no. Problems arise when insulation is installed in homes that aren’t suitable — typically where brickwork is damaged, cavities are too narrow, or the property is highly exposed to wind-driven rain. A proper pre-installation survey identifies and avoids these risks. For more detail, read our guide: can cavity wall insulation cause damp and mould?
What does cavity wall insulation cost?
Typical starting prices are around £1,500 for a mid-terrace, £2,700 for a semi-detached, and £4,300 for a detached property. Your actual cost depends on the size of your home, cavity width, and materials used. We provide a clear written quote after the survey with no hidden extras. For a full breakdown, see our cavity wall insulation cost guide.
Can cavity wall insulation be removed if it fails?
Yes. Failed or underperforming insulation can be extracted using specialist equipment and the cavity re-insulated with the correct material. We offer a full cavity wall insulation removal and replacement service.
How do I know if my cavity wall insulation is still working?
Signs of underperforming insulation include cold patches on internal walls, new condensation or mould on external walls, and higher heating bills without a change in usage. If you’re concerned, a borescope inspection can check the condition of the existing fill without removing it. Contact us to arrange an inspection.